I could get some piccies taken, of the clothes I have sewn over the holiday season. Finally! [inserts long boring technical explanation on why I can't get decent pictures of clothes when it is raining all day every day]*
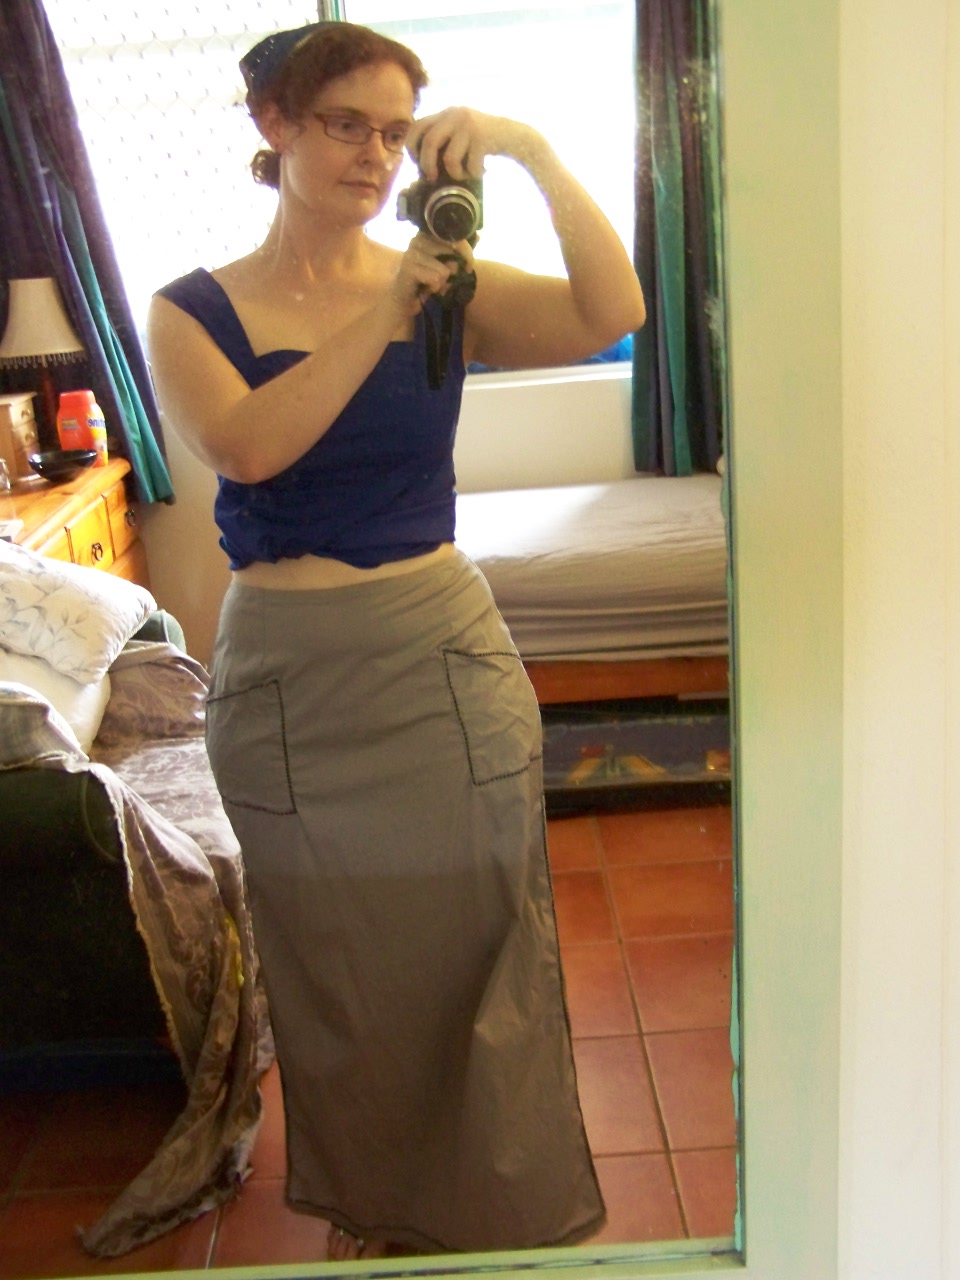
This one is based on a Glassons skirt, via the local op-shop, and, like the skirt in a previous post, was also a size 8, hired for $4 for the year or so it took me to recover my health. I did this version in a grey cotton-lycra poplin, one of my favourite kind of fabrics.

The original was a dark blue denim skirt which sadly I don't have a picture of. I had thought the heavy denim would make it too hot to wear but the slide-slits worked magic. (It was bizarrely good for practising archery in - easy to move in because of the side-slits, the straight pattern meant no excess fussy fabric, and denim, so I discovered, doesn't pick up grass seeds easily.) (And it has been too wet to try my new version out yet.)
Construction
I didn't actually take a copy of the skirt, as it was a simple straight skirt with slanting patch pockets and orange top-stitching. I did what I have done on a number of other occasions and worked directly with the fabric
1) I measured my hip-width front and back (because my quadriceps are big so doing a separate measurement for front and back creates a much better fit), then baste them together for ease of handling.
2) Put the skirt on and pin out darts, and shape the side seams
3) baste the darts and side-seam, try on, refine fit.
This way of creating a straight skirt has worked in the past to create a gorgeous-fitting skirt. Sadly, I don't think this fabric showcases it all that well - I think the fabric is a tad too light for the style of skirt, so it doesn't hang as well as the original did. But that is a fabric issue, not a fitting one.
4) Make pockets - I did this working from memory, and 'eyeballed' it till the looked the right size, with the right angled slant. I tried the skirt with the pockets basted on to make sure the line looked good across the hip. I do think a diagonal line in that area is a flattering addition to a straight skirt.
5) constructed skirt
6) consulted with my Sewing Buddy (aka my mum) about adding an emellished edging and decided it would look good.
7) Embellish in black rayon thread with the satin-stitch diamonds.
8) Model finished product, and conclude the embellishment was the perfect finishing touch, adding a definition the skirt lacked until then.
Although I love the results of fitting the skirt entirely on me from the start, since I see a few more straight skirts in my future, I am wondering if taking a bit of time to draft up a skirt pattern following this tutorial from BurdaStyle would make as nice a skirt with less fiddling round. But, what with planning to do the swing dress sewalong, and my work jacket needing mending, pattern drafting can wait.
*A note for the curious: In case you have (like my sister in London(!)) heard reports of "fierce storms" in Darwin and thought we were in danger of drowning like the rest of Aust, let me assure you it's okay. It is NORMAL for us to have fierce storms at this time of year. We are right in the middle of the wet season, we get weather like this every year, and everything is set up to cope with it. Worry about the rest of the country drowning, not us!
(If we get a category 3 or above cyclone bearing down on us, then worry about us. Meep)
The skirt turned out well, but as you say perhaps the fabric was not heavy enough. Probably after it has been washed and pressed it will hang better.
ReplyDelete